Add Your First Graft - Frontend to Backend
Goal
Connect a simple frontend app to a backend service using Graftcode - without writing controllers, DTOs, or any other code that handles connection.
What You'll See
- Connect a React app to a .Net backend in just one command.
- Save hours by implementing all its methods without Swagger or OpenAPI codegen.
- Call .NET backend methods like local functions - with autocomplete and type safety.
Step 1. Clone empty React app template
Navigate to new folder and use your favorite tool to clone the template project with command below:
git clone https://github.com/grft-dev/react-hello-world
This app is minimal - just a single page with Hello World, ready to call your backend. Let's open it in your IDE:
cd react-hello-world
code .
And now let's run the app to see it in action:
npm install
npm run dev
You can see the app running at http://localhost:5173
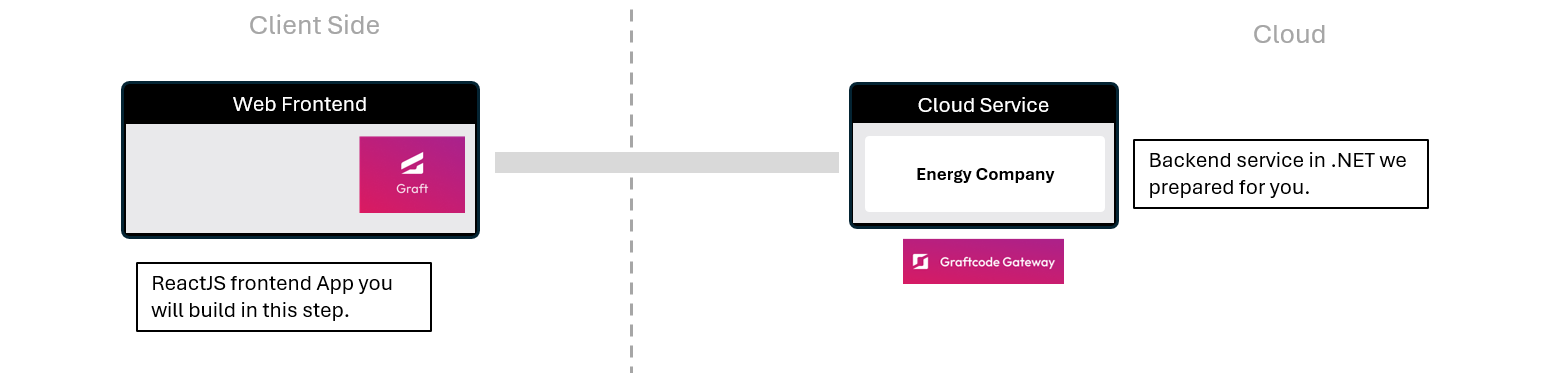
Step 2. View the backend service
Before calling backend service, let's see how it looks like. We prepared it in both old REST based approach and one exposed with Graftcode.
-
With REST in Swagger, you'll see a list of endpoints - raw routes, HTTP verbs, and payloads.
-
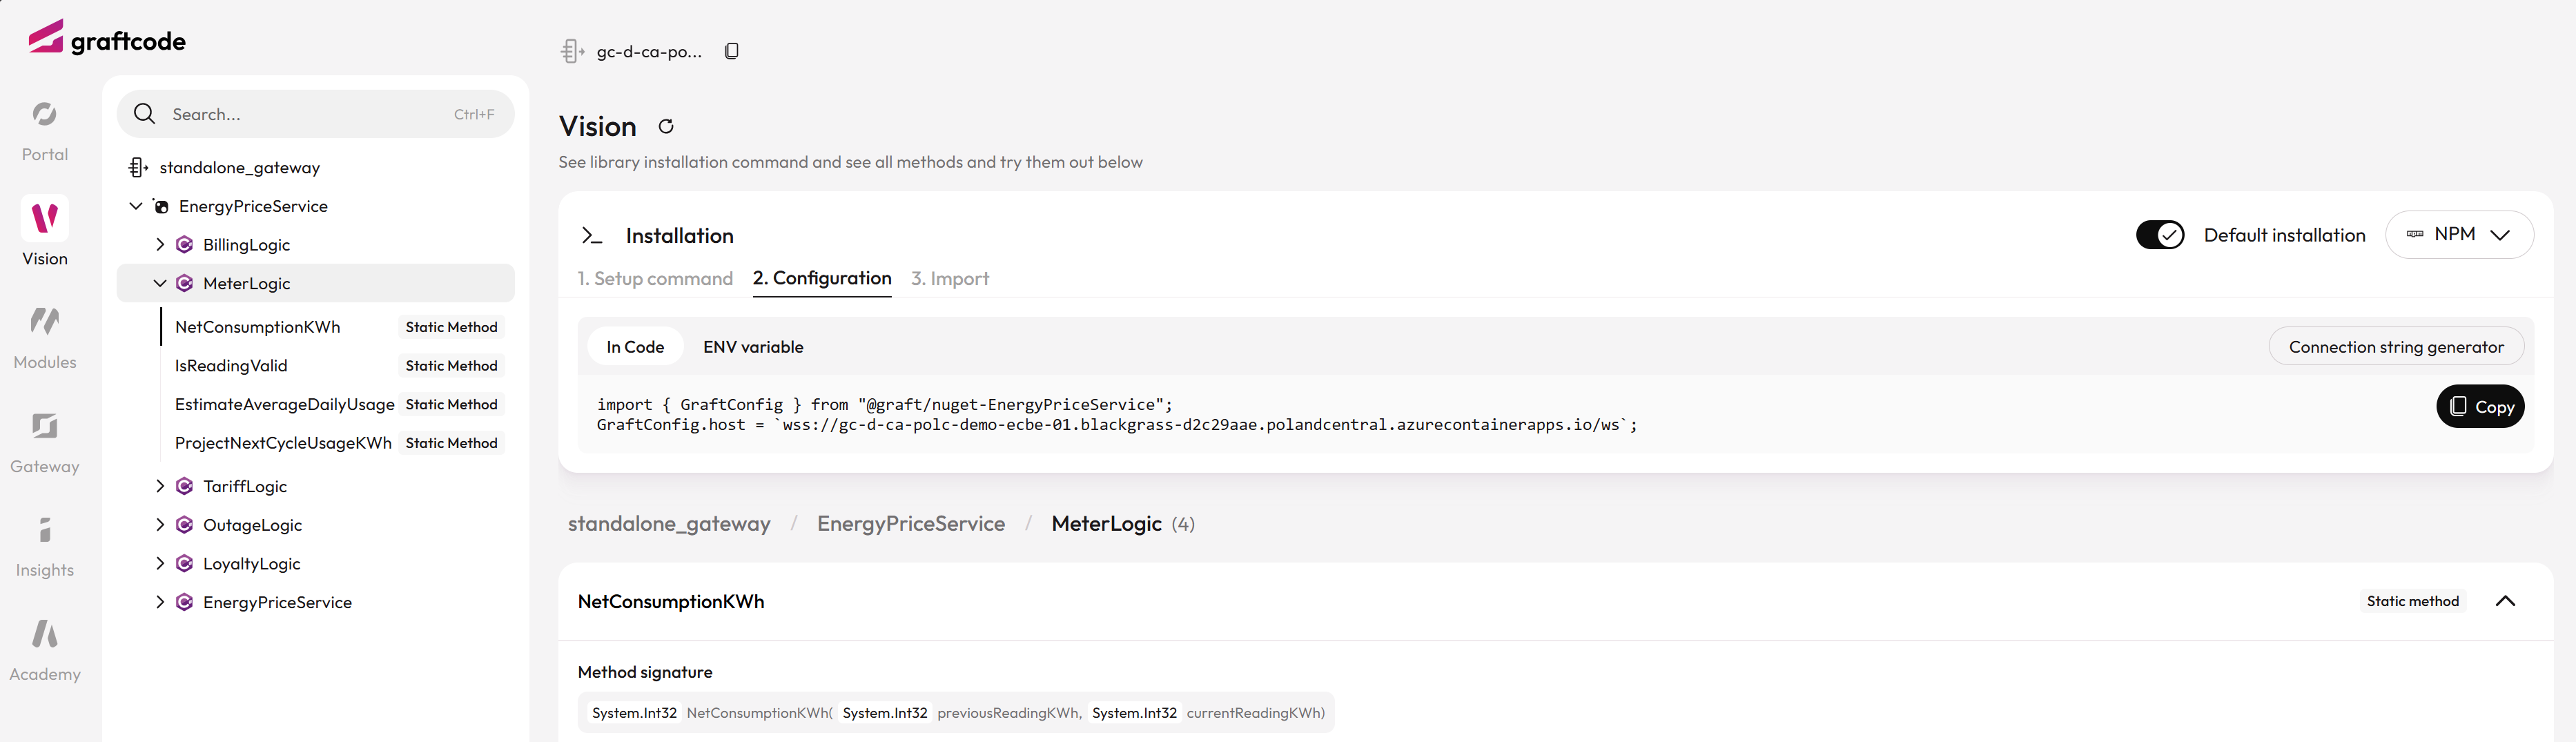
With Graftcode in Vision Portal, you'll see the same backend but exposed as regular classes and methods + package manager command to install it as dependency in any technology.
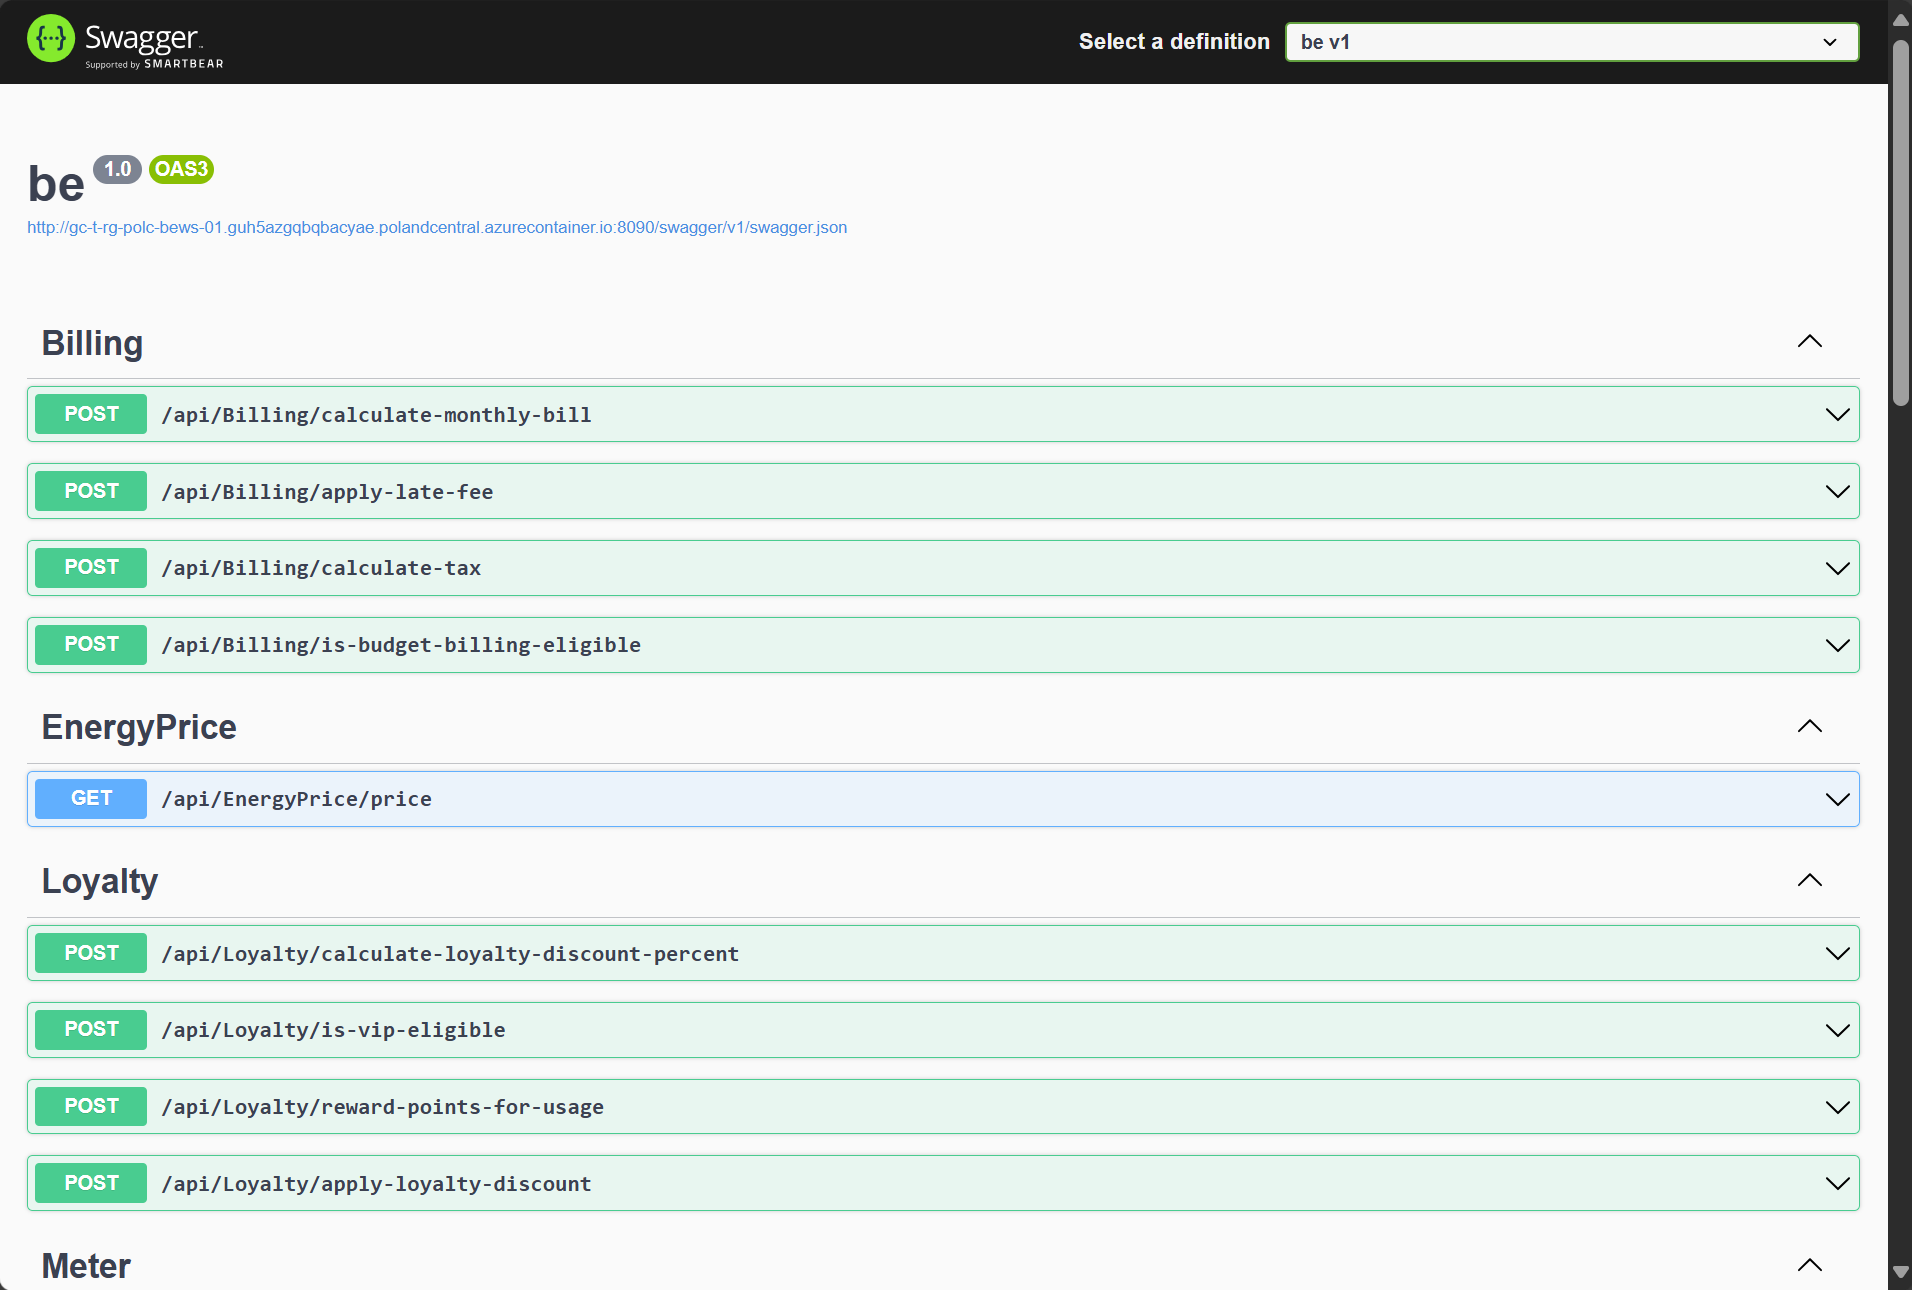
Graftcode saves you from writing, generating and maintaining client code - providing package manager command to install this service almost as regular dependency.
Step 3. Add your first Graft
Before we add our first Graft, we need to install hypertube-nodejs-sdk package. This is done manually for now, but we are working on making it automatic.
npm install hypertube-nodejs-sdk
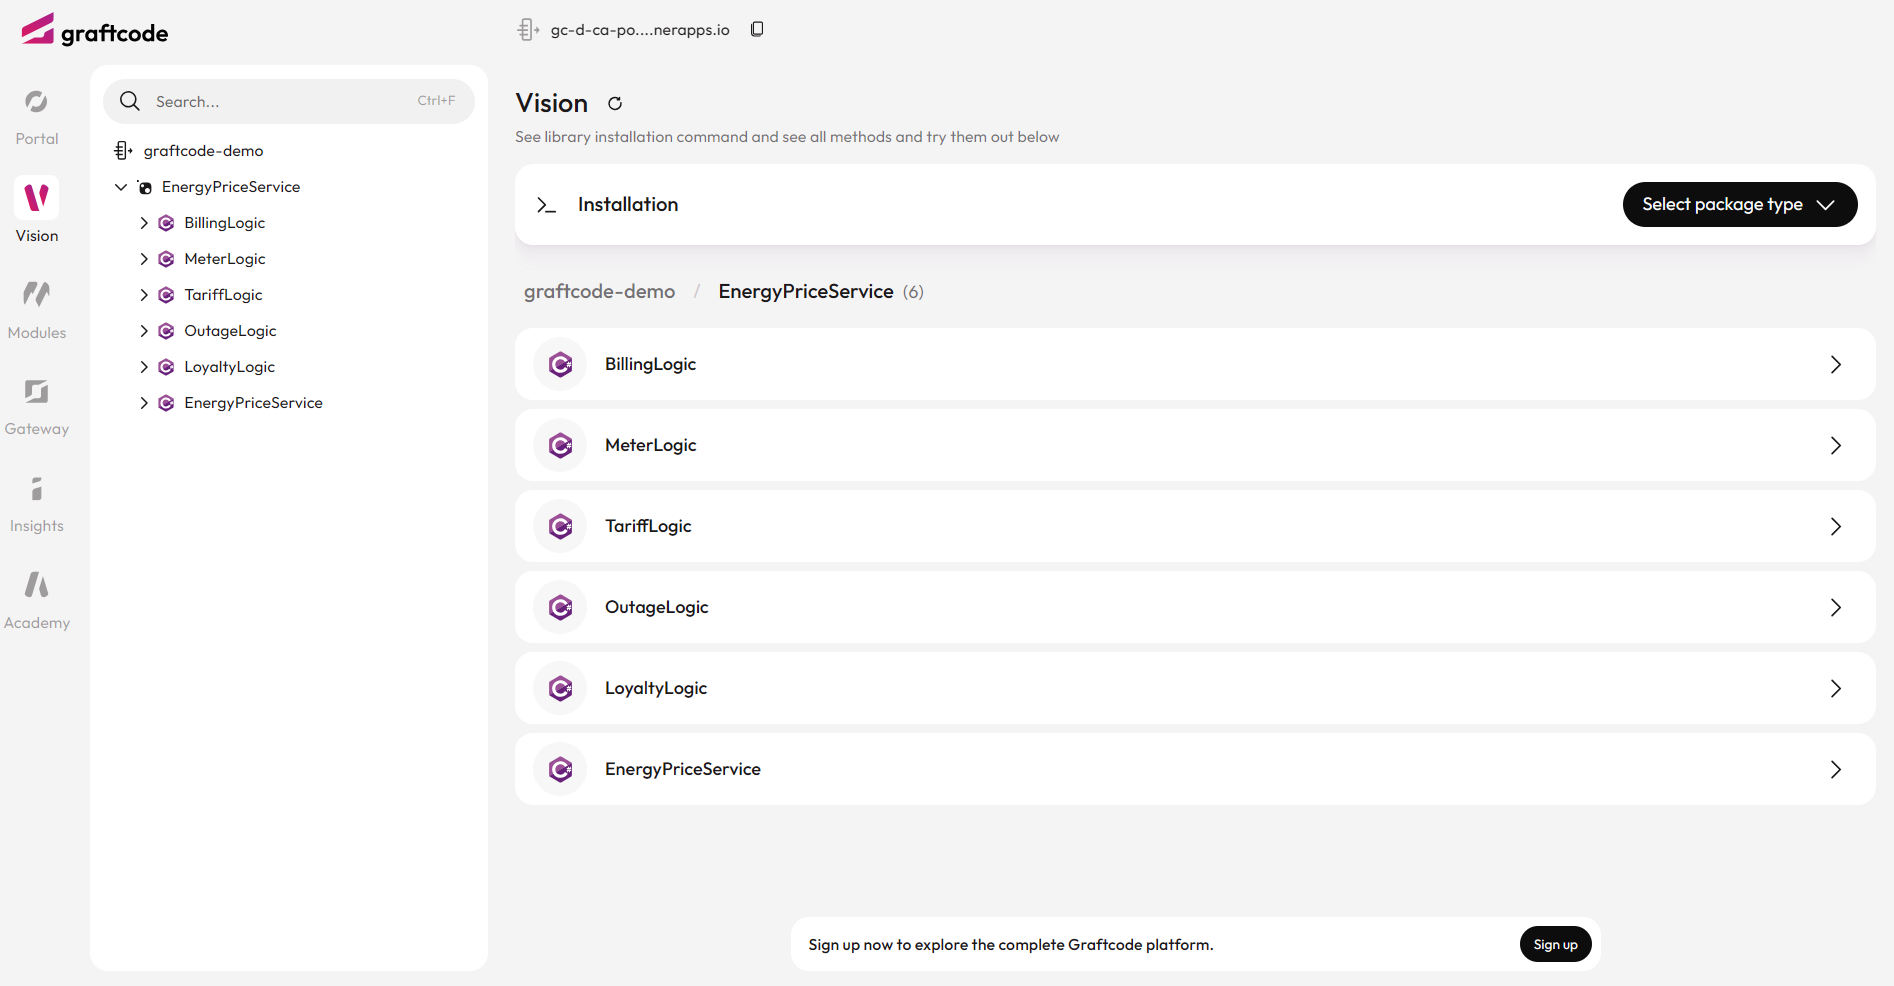
Once the package is installed, we can proceed with adding the Graft that will allow us to call the .NET backend service. The installation command is provided in the Graftcode Vision portal. Select preferred package manager from the dropdown and copy the command to your terminal window. As we're creating React app, we'll use NPM.
You can also copy the command from the box below:
npm install --registry https://grft.dev/4b4e411f-60a0-4868-b8a6-46f5dee07448__free @graft/nuget-energypriceservice@1.2.0
This command installs a Graft - a generated package that exposes strongly-typed classes and methods, allowing you to call external services as if they were part of your local codebase.
Now, your frontend can see backend classes, methods, and receive results directly - just like local code. Any call on those methods will pass the request through our super-fast Hypertube™ binary protocol connecting your browser directly to native-layer of runtime running this backend service in cloud.
Tip
It is not hiding REST or gRPC behind generated wrapper code. It is replacing it with direct runtime integration based on binary communication connecting directly to target runtime native-layer ensuring highest reliability and unbeatable performance.
Step 4. Import and configure the backend client
Before making any calls, we need to import the generated Graft client and set up a connection to the backend service.
This tells your React app where the service is hosted and how to reach it. The configuration is always easy to find and ready to copy from the Graftcode Vision portal. Just click on a second tab "2. Configuration" in Graftcode Vision Portal.
Open src\App.jsx and add the following code at the very top of the file. This imports React state handling, generated Graft client and configures the connection to the backend service. The configuration code is copied directly from the Graftcode Vision Portal.
import { useState } from "react";

import { GraftConfig, BillingLogic } from '@graft/nuget-EnergyPriceService';
GraftConfig.host="wss://gc-d-ca-polc-demo-ecbe-01.blackgrass-d2c29aae.polandcentral.azurecontainerapps.io/ws";
Note
You can also provide the Configuration Connection via environment variables or configuration files if preferred.
Step 5. Call the backend method
With the client imported and configured, you can now call your backend service as if it were a local function.
Let's update src\App.jsx and call one of its method. Put this line below GraftConfig.host and above function App().
const monthlyBillCostWithTaxPromise = BillingLogic.CalculateMonthlyBill(88.4, 1.4, 23);
Important
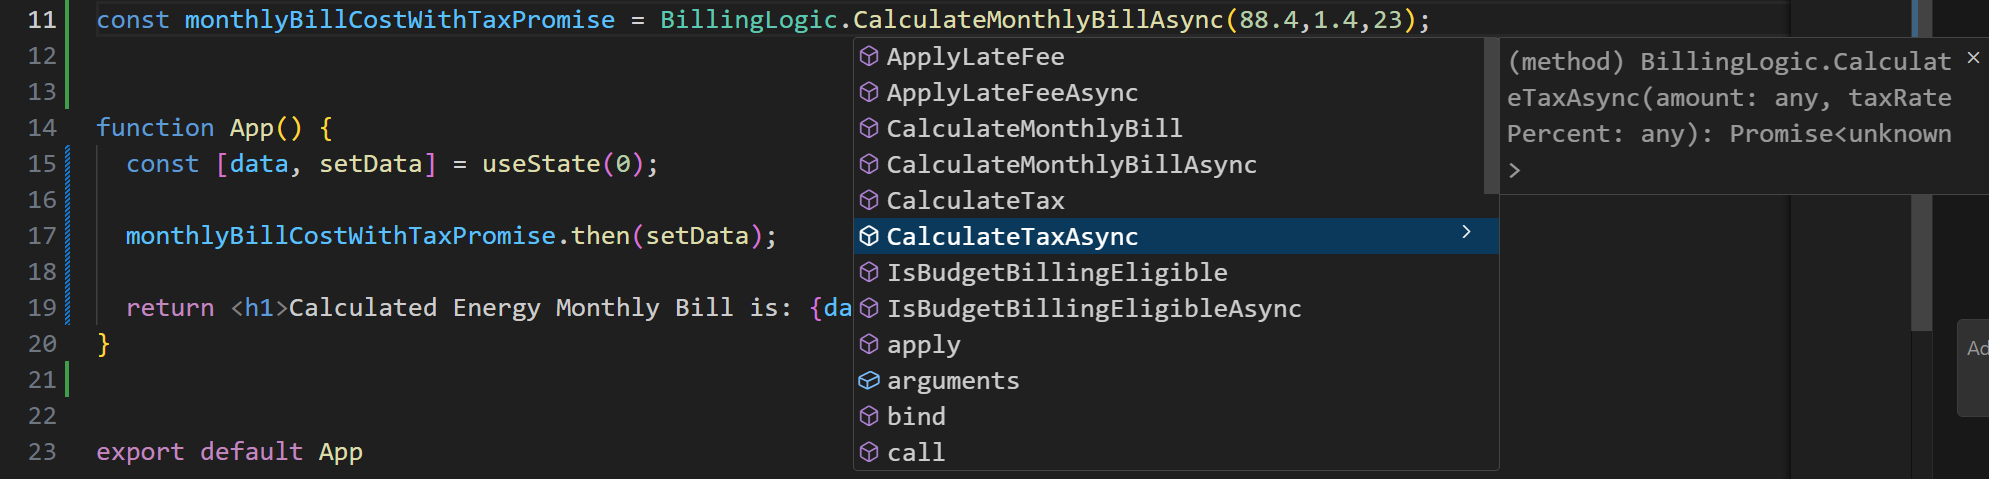
Notice how the backend interaction happens in this line: BillingLogic.CalculateMonthlyBill(..). It feels just like calling a local function. These calls are strongly typed, so you get autocomplete in your IDE, and they always stay in sync with the backend - automatically updated through the package manager whenever service is updated.
Step 6. Display the result in React
Next, let's use the result of that Promise inside our React component. Replace function App() in src\App.jsx with code provided below:
function App() {
  const [data, setData] = useState(0);

  monthlyBillCostWithTaxPromise.then(setData);

  return <h1>Calculated Energy Monthly Bill is: {data.toFixed(2)}</h1>;
}
If you've missed any step, here is the full code of src\App.jsx:
Run the app and you'll see the live backend value on your page.
npm run dev
Now open your browser at http://localhost:5173 and you'll see the result of your backend call displayed on the page.
Step 7. Try more methods
Now explore:
- Call 3–4 other async methods from the backend, using for example BillingLogic class.
- Notice auto-completion and type checks in your IDE for all methods and arguments.
- No REST/gRPC client code, DTOs, models - just direct, strongly-typed calls, thanks to Graftcode.
Step 8. Compare old-way vs new-way
Check this chart to understand how your daily integration process will change with Graftcode:
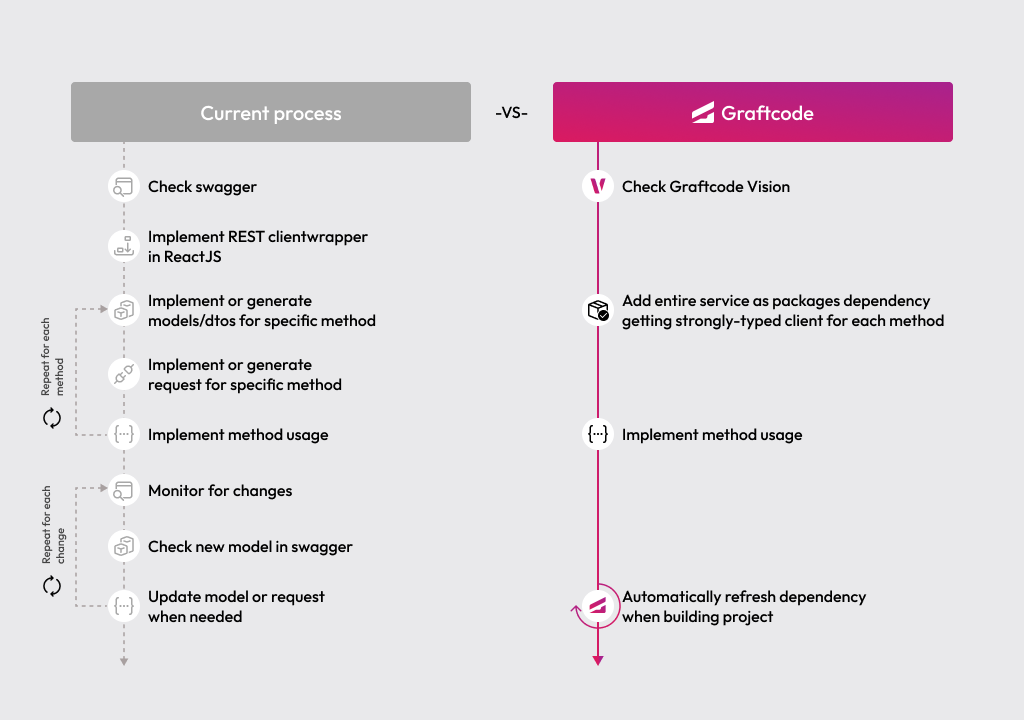
Important
Think how much time you saved. Normally, you would need to generate or hand-write client code from Swagger/OpenAPI, maintain models/DTOs and routes for every method. With Graftcode, it's just one command and a method call to any function regardless of service complexity. There is no need to monitor for changes or manually update across multiple layers. Everything stays in sync and typed checked interface validates methods usage at compile time. If the interface changes are evolutionary your Graft will keep working even if you do not decide to update to latest state.